In this post, we will see the Bulk Receipt creation for the amount received from Customer, through one single process.
What is Bulk receipt creation?
Bulk Receipt creation is a process of creating receipt vouchers for many customers in one click.
You can do it through the voucher Bulk Receipt available in the Accounts module of Saral Accounts.
To create Bulk Receipt, you can watch the video or read the below procedure:
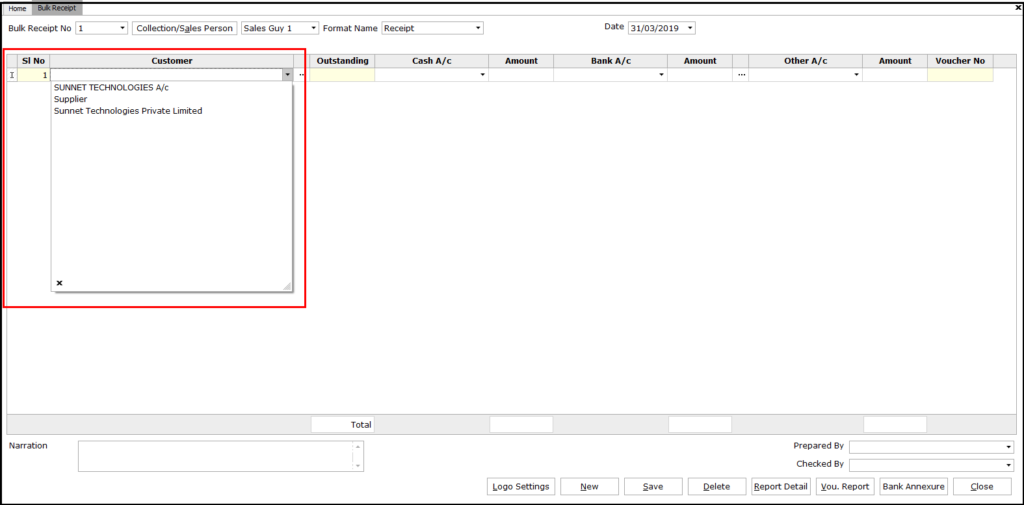
Go to Bulk Receipt voucher under the Voucher Entry menu in Accounts Module.
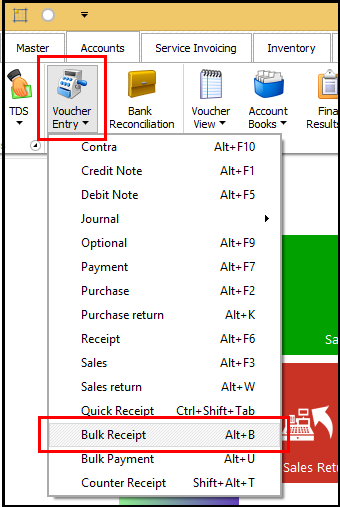
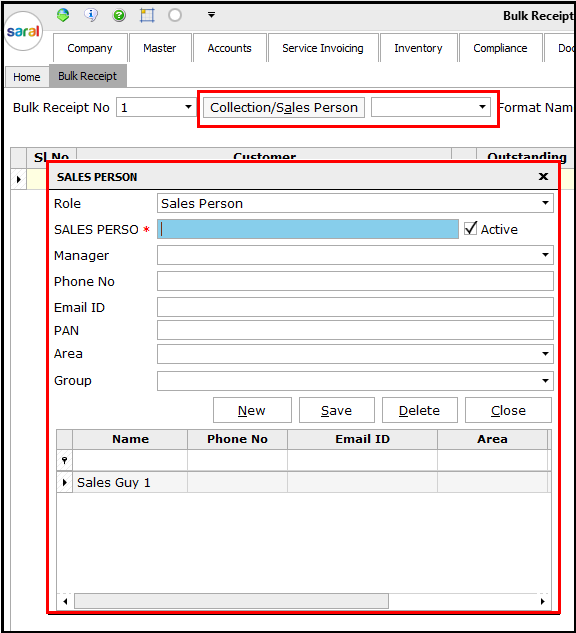
In the displayed screen, select the Collection/Sales Person name from the dropdown (if required). If a new name to be created, click on Collection/Sales Person button and created the new name.
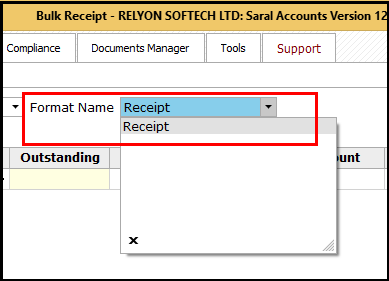
After selecting the Collection/Sales Person name, select the receipt format from the dropdown.
Note:
If only one format is available, then it will be selected by default.
The date of the voucher creation will be by default the system date. If required, the same can be changed.
Next, select the customer from the dropdown, for whom the receipt voucher has to be generated.
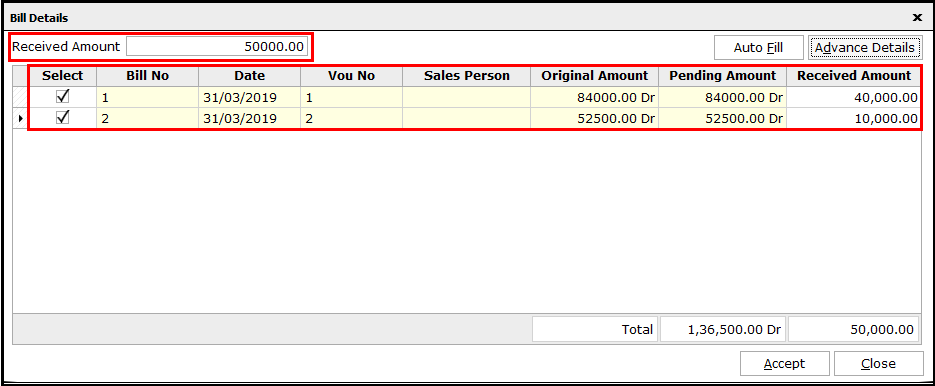
On selecting the customer, the Bill details window will be displayed with details of all pending bills. Here, enter the amount being received from the customer.
Note:
In case of multiple pending bills, enter the amount received against each of the bills. Else, click on Autofill to adjust the amount automatically. IN this case, the amount will be adjusted against the bill pending for longer duration first and continue to adjust the later, if the amount is available.
After entering the details, click on Accept to continue.
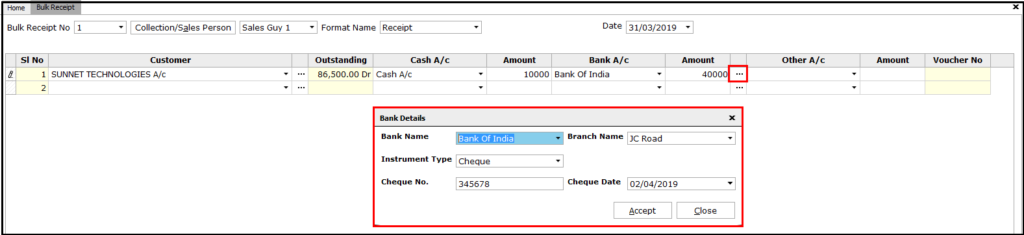
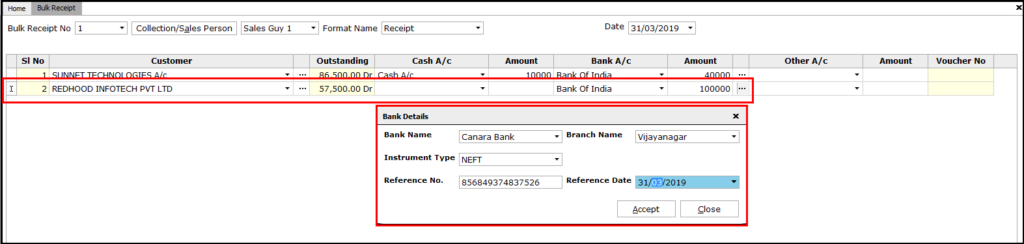
After setting the amount against the respective bill, enter the mode of the amount received i.e., by cash or cheque on NEFT etc.
This is done by entering the amount in the respective column in the voucher creation screen and selecting the ledgers from the dropdown, as applicable.

The details of amount received through bank mode i.e., cheque, NEFT, RTGS, etc. has to be entered in detail in a sub window by clicking on the “…” button next to the amount.
Note:
The various types of instruments can be selected from the dropdown of Instrument Types.
Similarly, select the next customer for whom the receipt has to be raised.
In case the voucher to be raised is for any kind of Cash Discount or Write off etc., then the amount for has to enter under the column others and respective ledger for the same has to be selected from the dropdown.

Note:
The amount entered will be reduced from the pending bill amount.
Next, enter the narration for the voucher and the name of the executive who prepared and checked the voucher.

Save the entries done by clicking on Save. On save, Voucher will be generated individually for each customer entered.
To view the receipt generated, click on Vou. Report button. In the displayed window, select the required details and click on Preview to view the voucher.
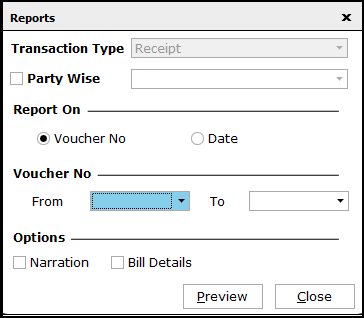
The details in the window are as below:
- Party Wise: If a specific party voucher is to be viewed then enable this check box, else keep it disabled to view all party vouchers.
- Report on – Voucher No: Voucher number wise details can be viewed on selecting the range of voucher number in the next row
- Report on – Date: Based on Voucher date, details can be viewed on selecting the range of voucher date in the next row
- Options: Options fields that can be enabled to be viewed in the voucher.
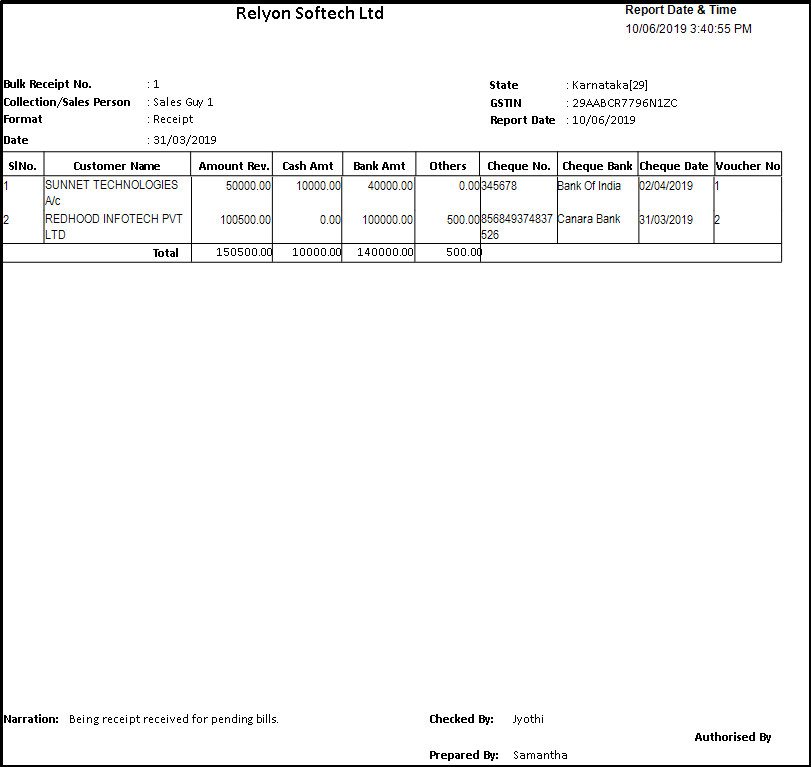
The voucher so generated can be viewed as shown below which can be printed if connected to a printer.

If the voucher is required with the company logo, enable the same in Logo Settings. The process can be viewed here.- hyperlink of logo settings
For internal reporting purpose where all the details have to be viewed in a single sheet, click on Report Details. The report for the selected voucher will be displayed.
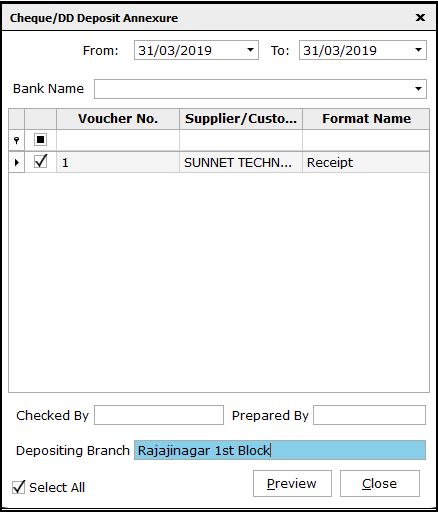
For cheques received, a bank deposit annexure can be generated by clicking on Bank Annexure. On clicking the button, select the date range and the vouchers for which the annexure had to be generated. Also, enter the cheque depositing branch name and click on Preview.
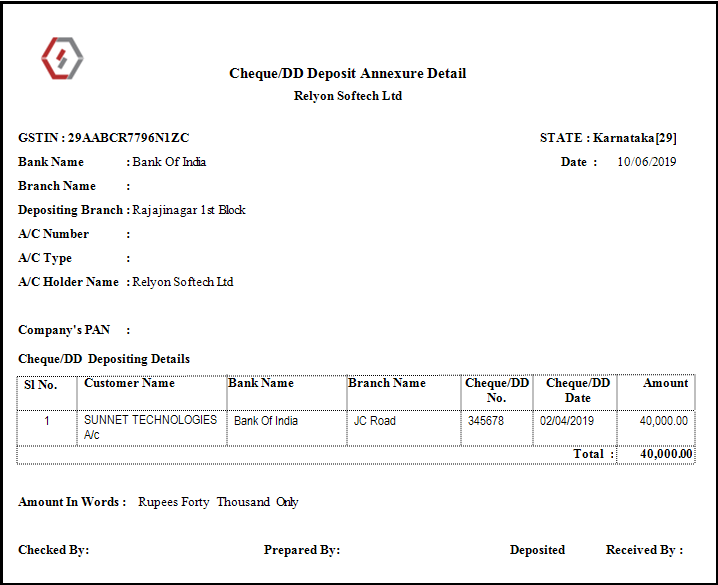
The report generated can be printed and submitted to the respective bank for cheque deposit.
With this, the process of Bulk Receipt generation completes. Let us know your opinion by commenting below.