In this post, we will see Item Master Creation in Saral – Accounting and Billing software.
Let us start.
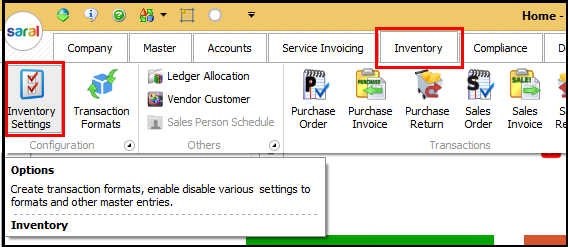
Before creating Items, certain settings related to Item creation have to be done in the Inventory Module. This can be done by going to Inventory Settings under Inventory.
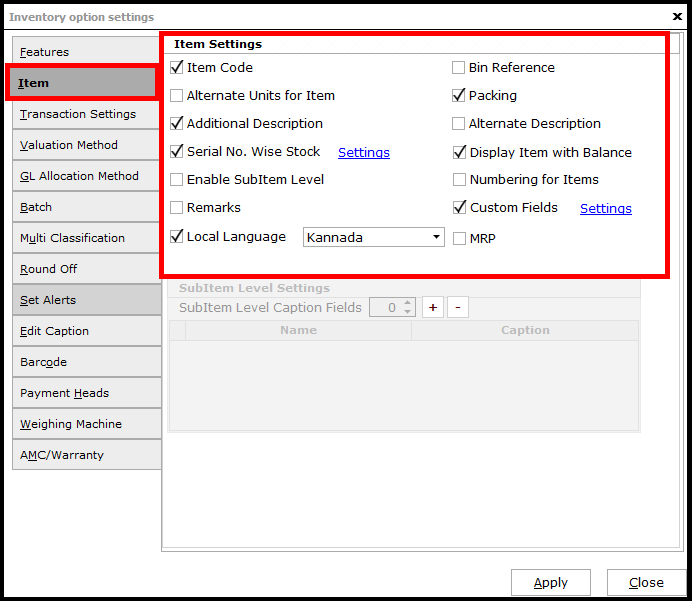
Here, go to Item tab and select the required options to be enabled during Item details entry.
Now for adding the Item / stock details, Go to Item under Master.

The item details entry window will be displayed. Please note that few fields in this window are by default and few fields are displayed based upon the selection done in the inventory settings window.
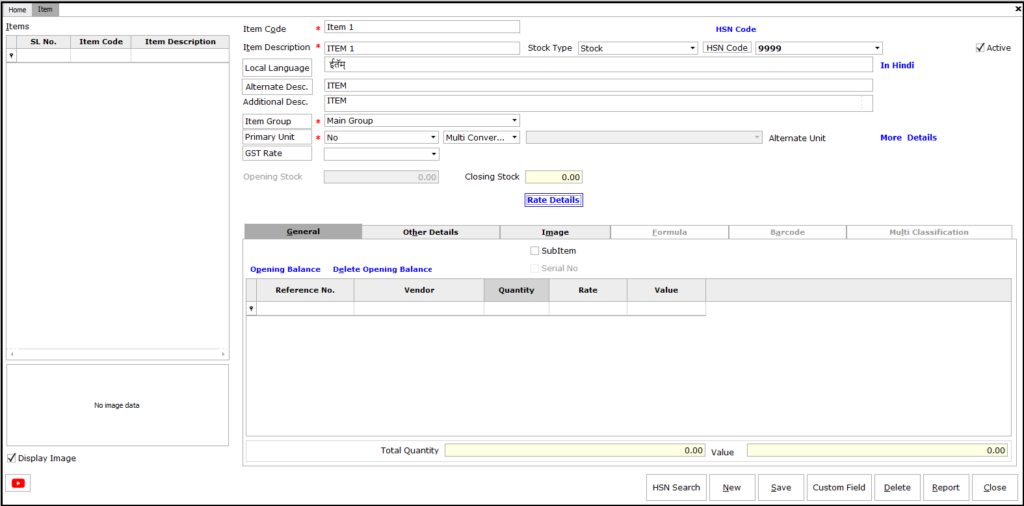
Start entering the item / stock details in the window. Note that all fields with asterisk mark are mandatory to be entered.
The details to be provided are as below;

- Item Code: A unique number to identify the Item / stock as maintained at the business
- Item Description: Detailed Item / stock description to a better understanding
- Stock Type: Select the stock type applicable for the item by clicking on the drop-down list.
- Stock – Item used in a business transaction
- Non-Stock Asset – Capital Stock which is an Asset
- Non-Stock Expense – Capital Stock which is an Expense
- Service – Service maintained as an item
- HSN Code: HSN code of the Item. This can also be searched through the HSN Search button given in the bottom of the screen. Press F9 or click on HSN Code button to enter the code in the list.
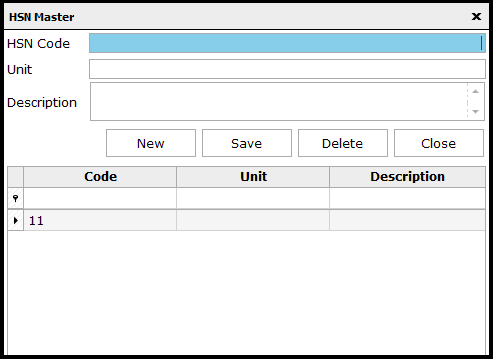
- HSN Code: HSN Code for an Item.
- Unit: Mention the Unit code which refers to an Item.
- Description: Describe the Item’s HSN code
On save, select the applicable code from the dropdown.
- Active: For particular Item, if it is in an active business transaction, enable the option or else keep it disabled.
- Local Language: Enter the item / stock name in the local language but click on the link given by the side of the field

- Item Group: Create the Item Group by clicking on the Item Group button or press F9.
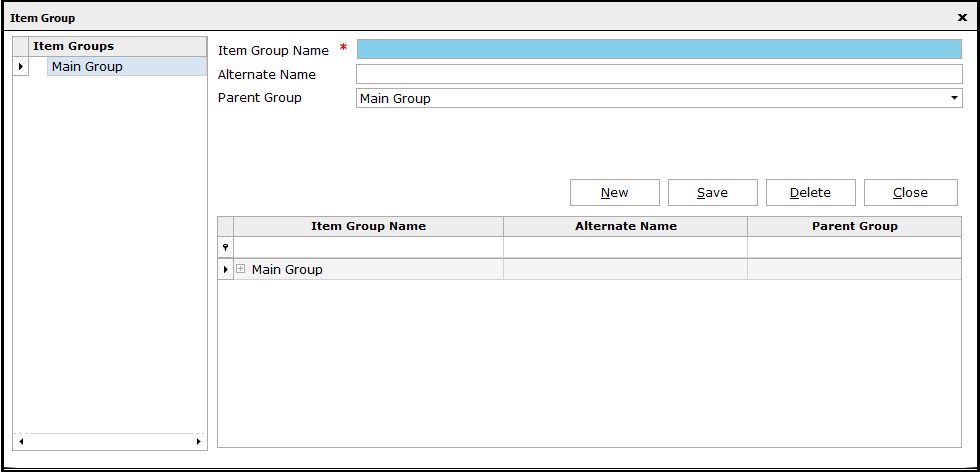
Here, enter the Item group details. On saving the details, select the applicable group from the list.
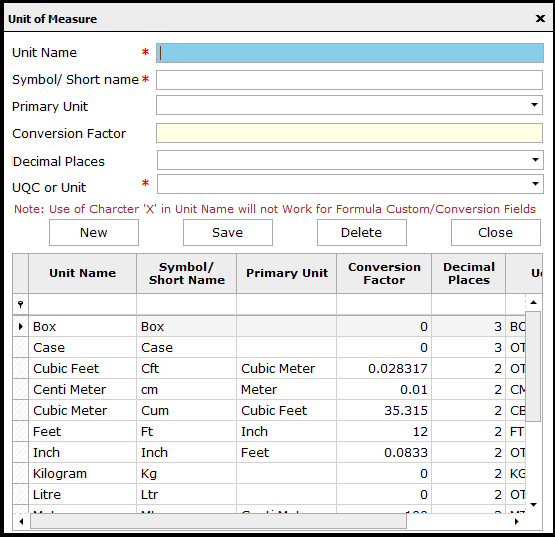
- Primary Unit: Select the applicable measuring unit for the item from the list provided. If the unit is not available in the list, press F9 or click on Primary Unit button and create the Unit.
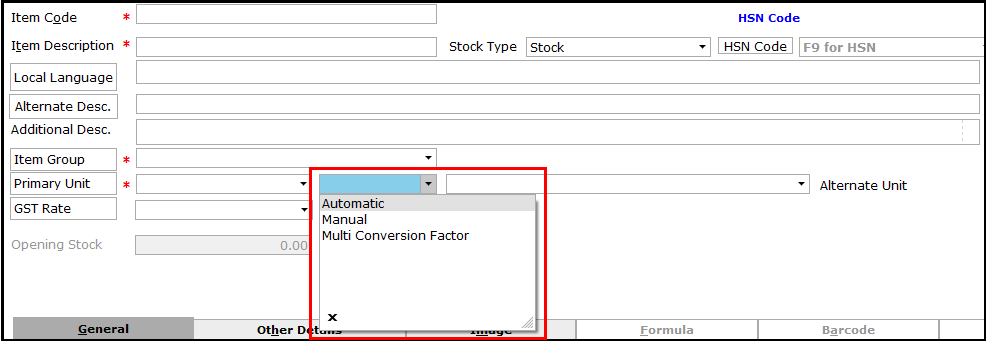
If the alternate unit is enabled in inventory settings, then enter the mode of selecting the alternate unit. They are;
- Automatic – Automatically select the alternative unit (based on the entry in Unit of Measure window)
- Manual – Manually select the alternative unit
- Multi Conversion Factor – Select multiple alternative units
- GST Rate: Select the appropriate GST rate applicable for the Item from the drop-down list.
Next, enter the general tab details for the item / stock. Here, details of item like Reference No., Quantity, Rate and other details as applicable are entered

- Click Opening Balance to display the stock opening balance entry window
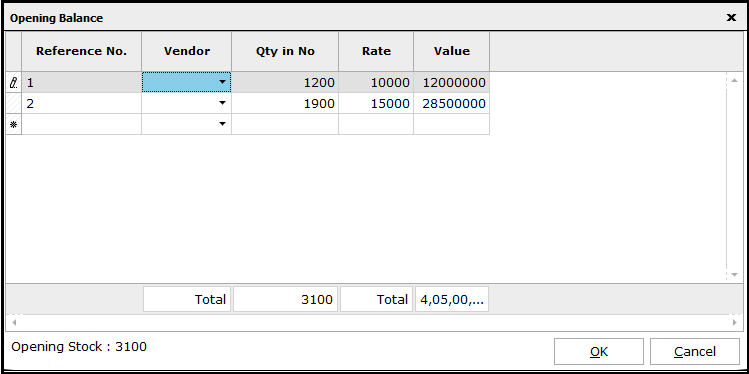
- Select the Reference no, Vendor from the drop‐down menu.
- Enter the Quantity and Rate of the Item.
- Click Save in the Item master window
The stock details will be updated as the opening balance for the item.
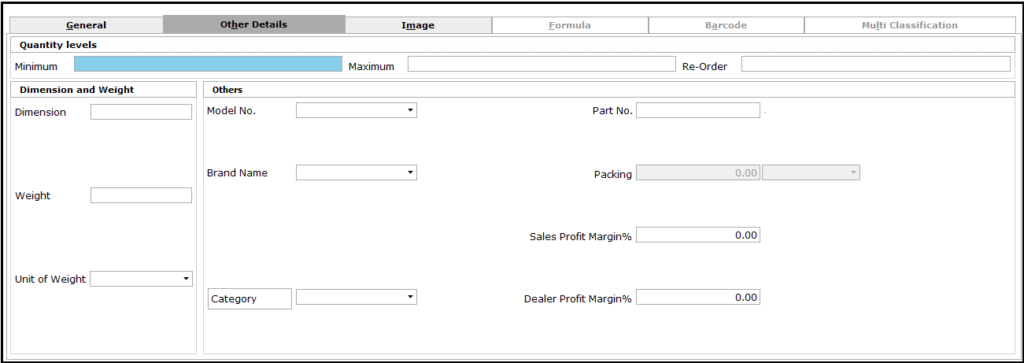
Now, enter other details of the items like Quantity Levels, Dimension, Weight and so on under Other Details tab.
The image of the item can be saved under the Image Tab. The appropriate image of the Item can be uploaded which will be displayed in all the transactions when the item is selected.

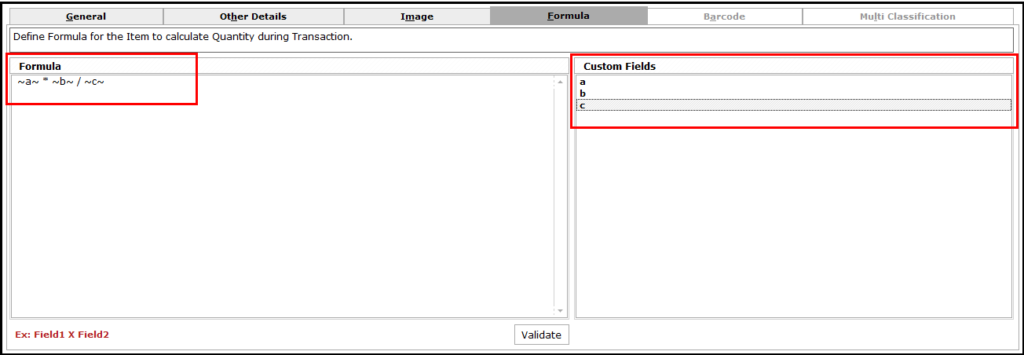
In case of multiple conversion factors and if the units have to be converted from one unit to another through a formula, the same has to be set in Formula tab.
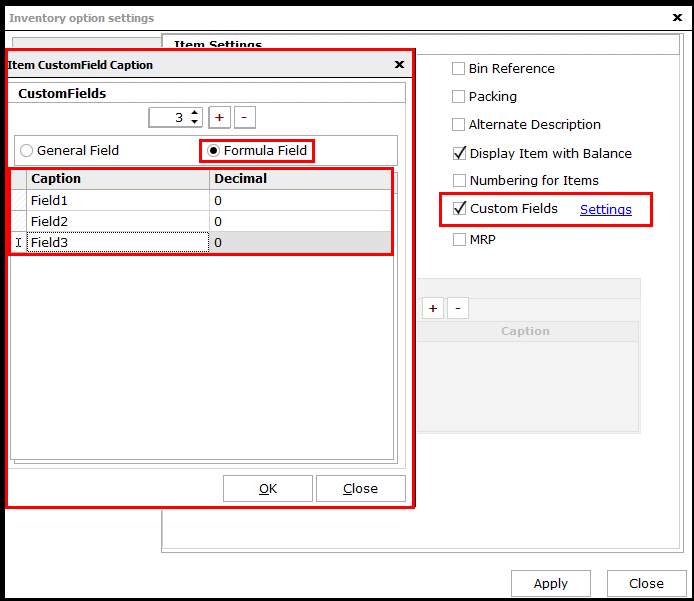
In order to define formula, the first custom field has to be enabled in Inventory Settings and the fields applicable for formula creation have to be entered.
Now, click on Formula tab in the Item master window and enter the required formula for the conversion.
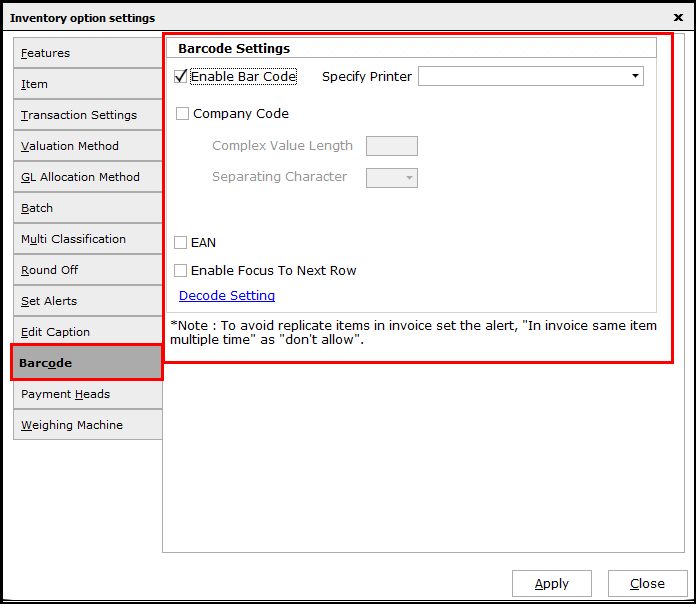
Items can also be enabled with Barcodes if required. To enable the Barcode, enable Barcode under Inventory Settings.
Now, click on Barcode tab in the Item master window and enter the item Barcode details.

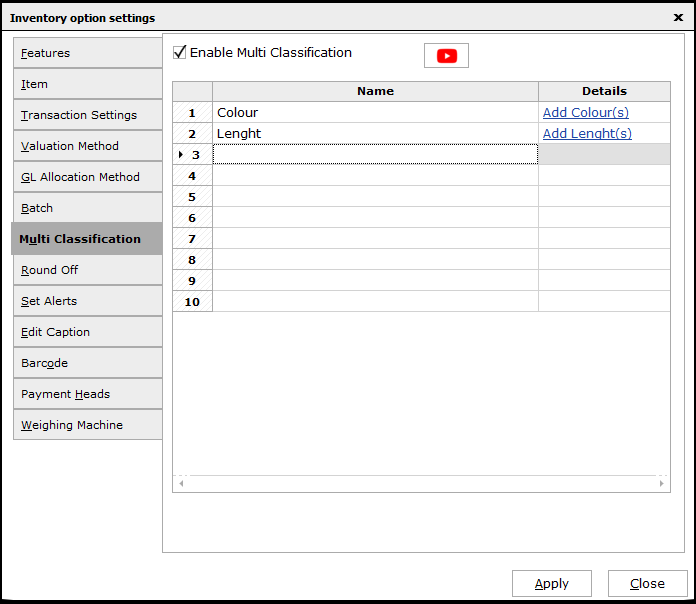
If the item has multiple classifications for one item like color, length, etc. then enable Multi-Classification option under Inventory Settings.
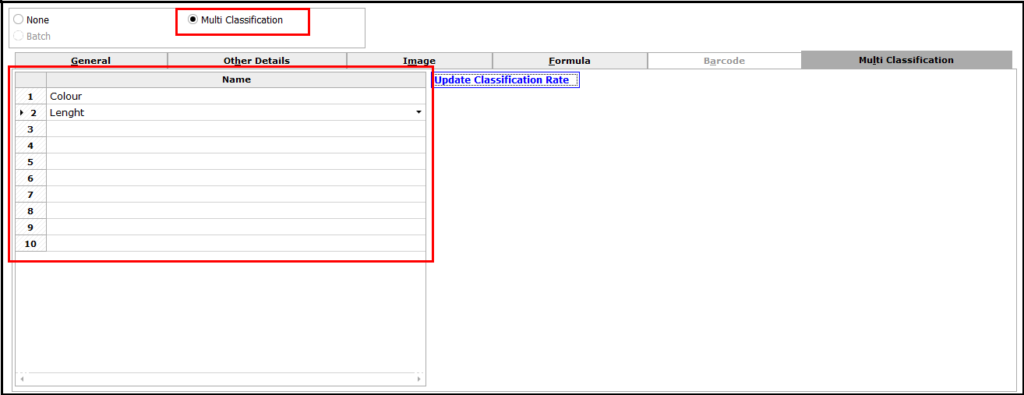
On entering item details, select Multi classification option and enter the required classification details applicable in Multi-Classification tab.
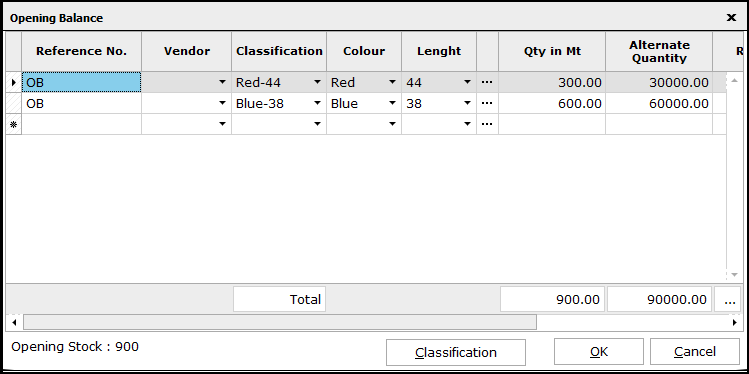
Here, parallelly, update the opening balance of the Item with the classifications enabled.
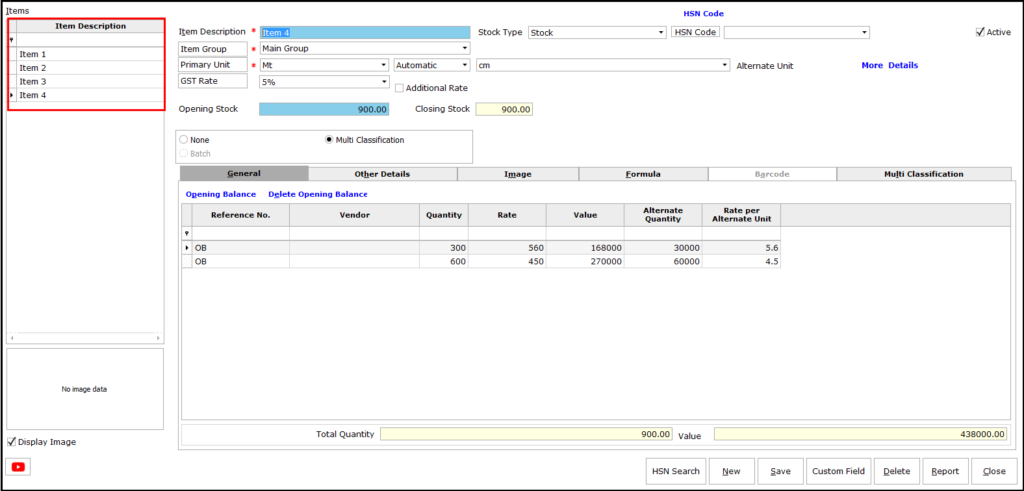
After entering all the required details of the item / stock, click on Save to save the details. The saved items can be viewed in the left side of the screen. If required to edit any information of the item, double click on the item, edit and save. The details will be updated.
In order to search the HSN Code for the Item or Service, click HSN Code and the following window will be displayed.
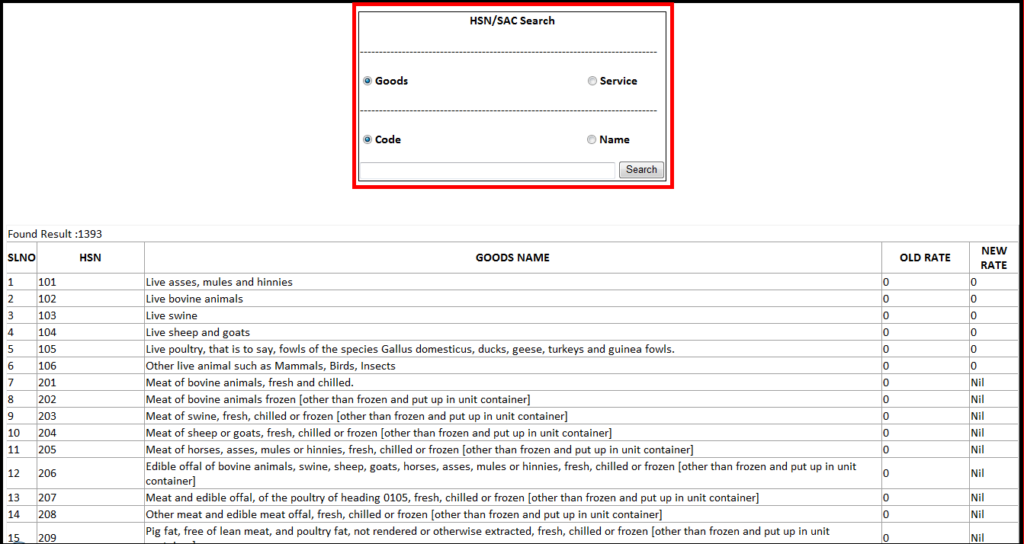
Here select Goods or Service which has to be searched. The search can be is both ways i.e., enter the HSN Code to know the items under the code or enter the Name of the item to know the code applicable for the item.
An additional 10 custom fields can be created apart from the default fields given in the item master during item creation. To do this, enable Custom Fields in Inventory Settings and provide the required number of fields under General.
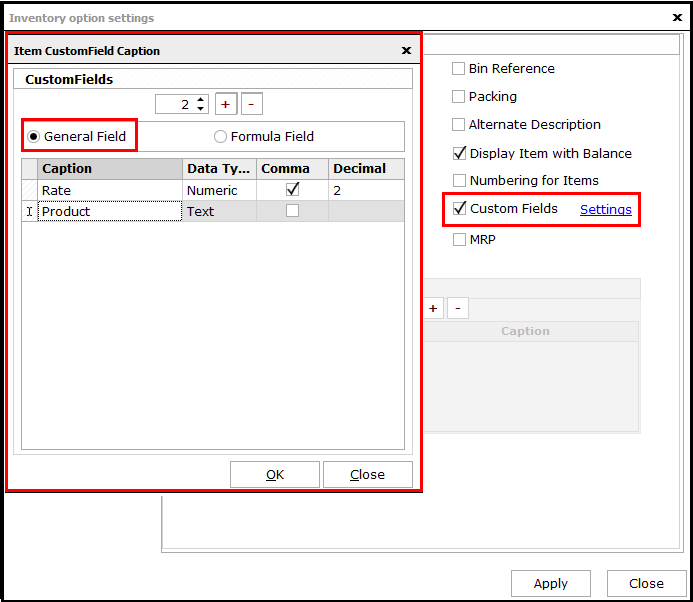
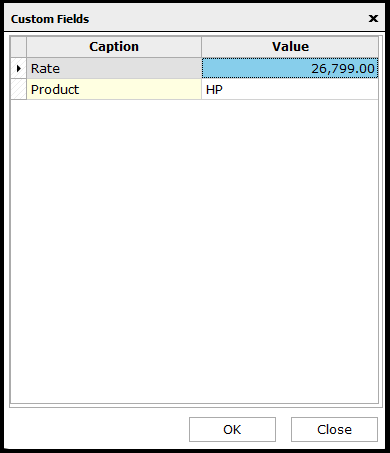
In order to add the details custom item details, click on Custom Field button in Item screen and enter the required details w.r.t the item.
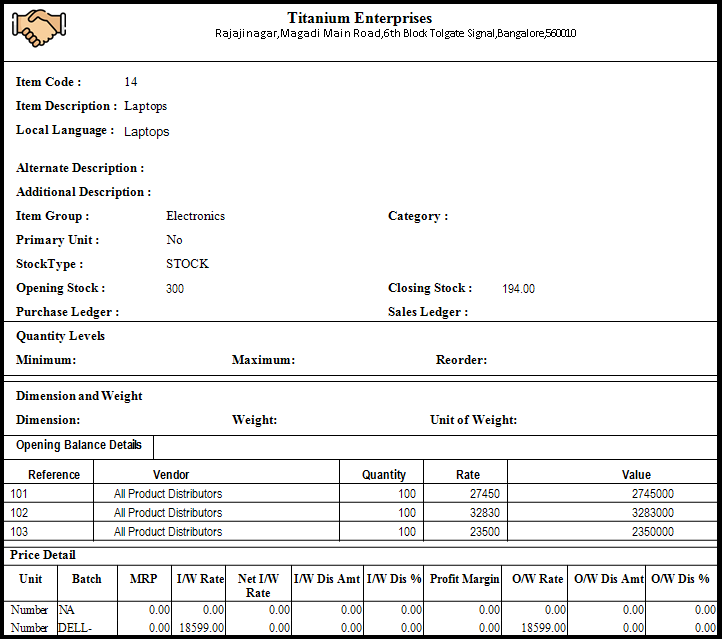
After entering all the details, if a report of any particular item is required, then select the item and click on the Report button. The item report will be generated.
This completes the process of Item master creation in Saral. Let us know your opinion by commenting below.


