In this post, we will see the steps for Ledger Creation in SARAL Accounting and Billing software.
A Ledger is a book of an account which contains records of business transactions. It is a separate record under general ledgers that are assigned to a specific entity like assets, liability, debtors, creditors, etc.
In Saral Accounting and Billing, ledgers can be created initially during the company master settings or during transaction creation.
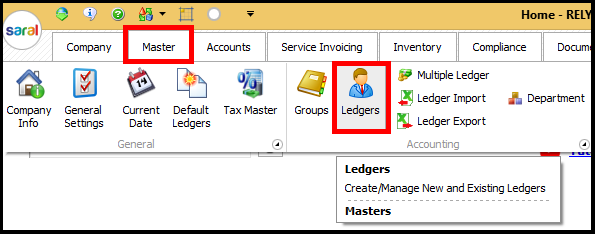
To create the ledger during the company master creation, go to Master and click on Ledgers.
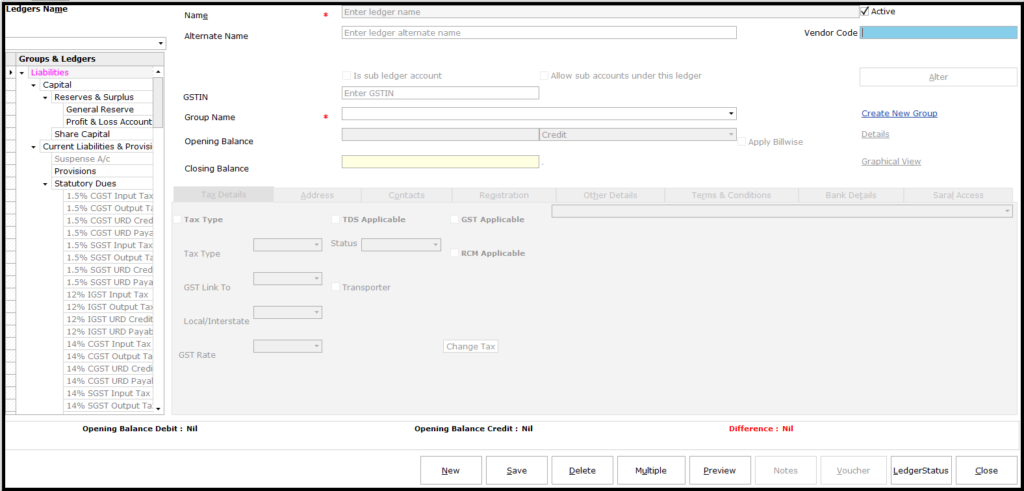
 The ledger creation window will be displayed. In order to create the ledger, you need to provide the details of the ledger in this window.
 On the left side of the window, the groups under which the ledgers will be created are listed.
The details to be entered are as below;

- Name: Name of the ledger being created
- Alternate Name: Any other name for the ledger
- Active: by enabling this option, the ledger will be made available for all transaction. If this check box is disabled, the ledger will be hidden during transaction entry.
- Vendor Code: The vendor identification code (if any)
- GSTIN: Vendor GSTIN Number
- Is sub-ledger account: On enabling this checkbox, the ledger will be created as a sub-ledger under another ledger
- Allow sub-accounts under this ledger: This will allow the user to create sub-ledgers under this ledger

- Group Name: Select the applicable group for the ledger, from the drop-down list
- Create New Group: If the required group is not available in the list, create a new group through this link
- Opening Balance: Enter the opening balance if the ledger (if available).
- The DEBIT/CREDIT type will be auto taken depending on the group selected.
- Apply Billwise: On enabling this option, the user will be required to provide bill-by-bill details of Opening Balance amount.
- Closing Balance: This is an auto-update field on Transaction entry
- Graphical View: This will provide the Graph on the transactions occurred in the ledger
On entering on the details, the details entry tabs will be enabled. This will depend on the type of Group selected for the Ledger.
 The information tabs are as below;
Tax Details Tab: Enable the required types of tax-related information.
 Address: To provide address and related information of the ledger entity.
 Contacts: To provide additional contact details of the entity. Click on Add new to add the details.
 Registration: In order to provide the Statutory registration details of the entity. The GSTIN of the vendor/customer can be verified on clicking Verify GSTIN button.
 Other Details: To capture other details like Credit Limit, Default Sales & Purchase type, etc. for entity transaction.
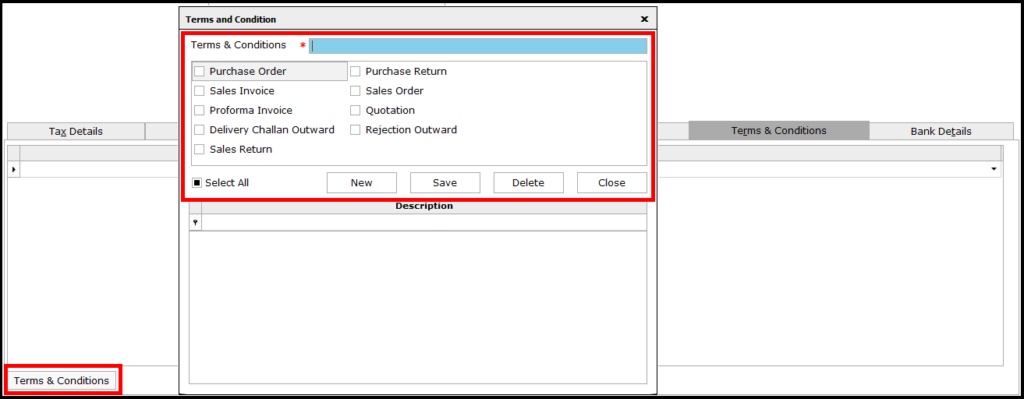
 Terms & Conditions: To apply default T&C for the entity. This can be applied for a specific transaction or for all. Here, to enter the details click on Terms & Conditions button shown on the left bottom.
 Bank Details: This is in order to capture entity bank details.
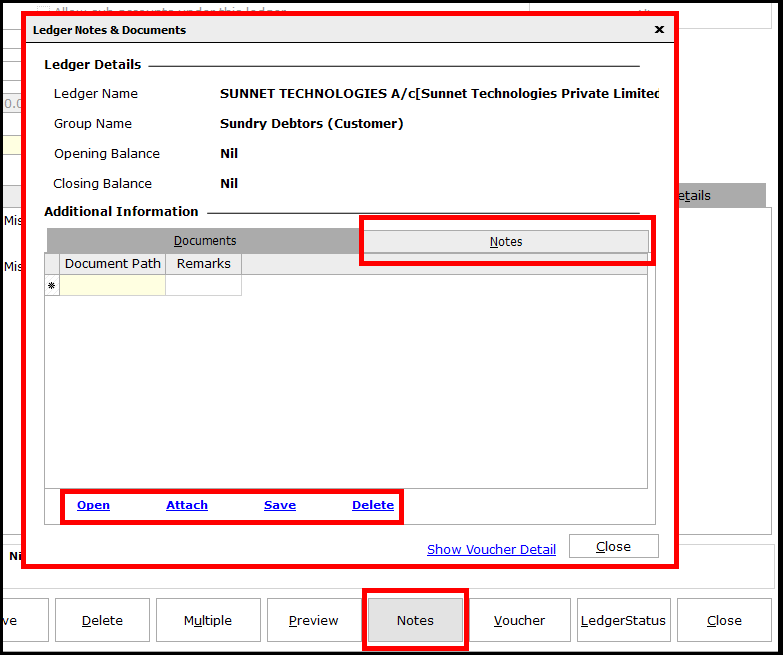
 Enter the relevant details and Save. To enter any remarks/notes for the ledger or to attach the document in soft copy, click on Notes Button. In the window displayed, the ledger can be given with any notes or attached with any soft document.
 This comes to an end of this post. Also, let us know your opinion by commenting below.
Related: Default ledger creation in Saral


